

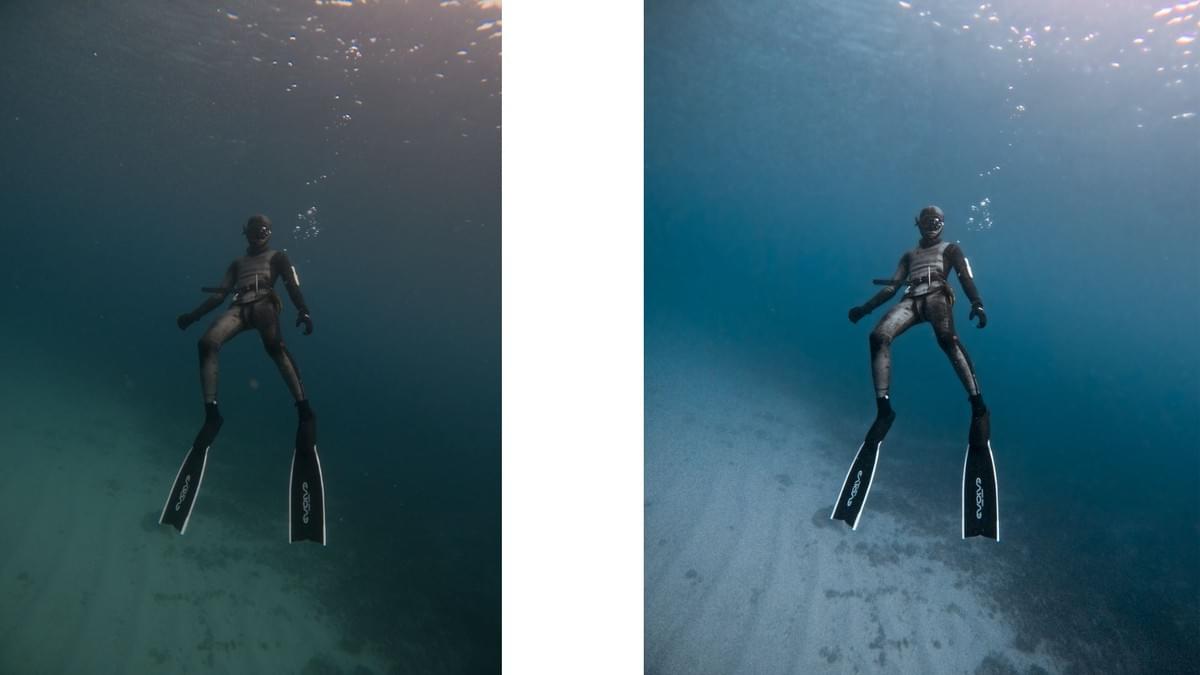
An In-Depth Guide to Color Grading GoPro Underwater Footage: Principles and Step-by-Step Techniques
This article provides a comprehensive look at how to use Adobe Lightroom for underwater color grading. We’ll explain the rationale behind each adjustment and detail the exact steps you need to follow.
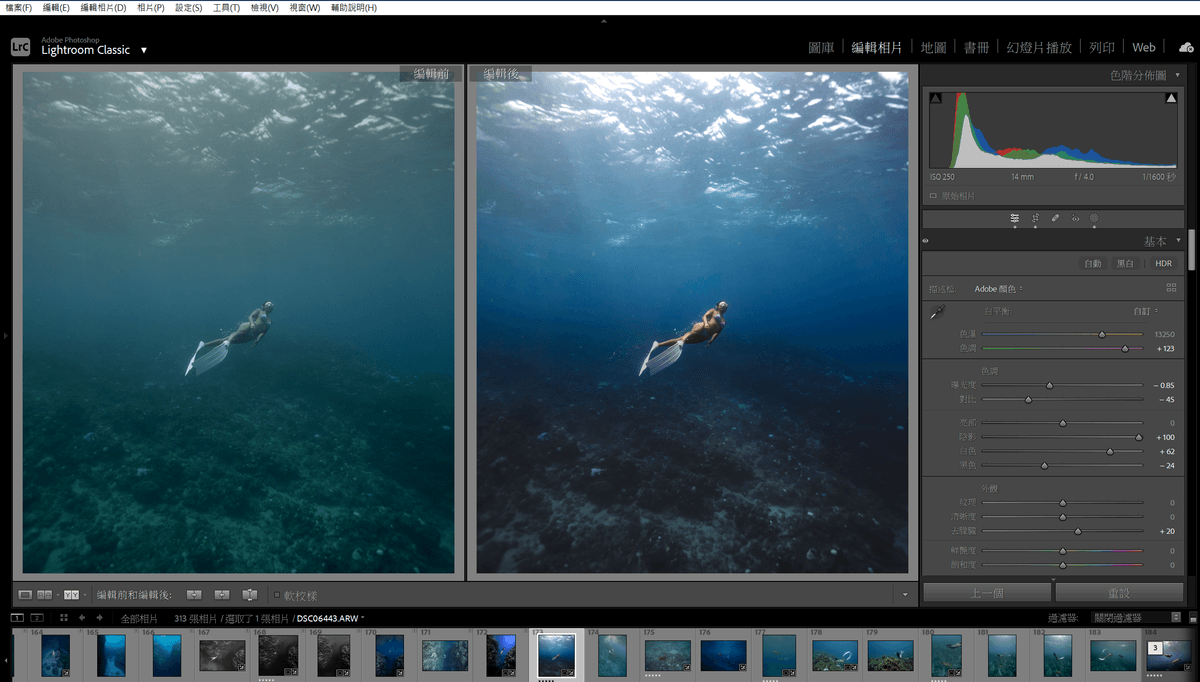
Why Use Lightroom for Underwater Color Grading?
1.Professional Color Grading Toolset
- Light Control: Precisely adjust exposure, shadows, highlights, and blacks.
- White Balance: Correct common underwater color casts (often blue or green).
- Color Mixer: Fine-tune seven different color channels (Red, Orange, Yellow, Green, Blue, Purple, Magenta).
- Localized Adjustments: Apply targeted edits using masks.
- Noise Reduction: Address common underwater noise with various techniques.
2.Safe Editing Environment
- Non-Destructive Editing: Your original file remains untouched.
- Adjust or Undo Anytime: All edits can be revised or reverted.
- Multiple Versions: Create various editing drafts for comparison.
3.Efficiency
- Batch Processing: Apply the same adjustments to multiple photos taken in the same environment.
- Presets: Save and reuse your favorite color grading settings.
- Seamless Integration: Easily transfer your work to Photoshop for more advanced edits.
The Importance of RAW Form
- Retains More Image Information: Crucial for low-light underwater conditions.
- Greater Editing Latitude: Allows for significant recovery of underexposed areas.
- Easier White Balance Corrections: Helps tackle the common blue-green cast in underwater shots.
- Preserves Details: Essential for showcasing the intricate structures of underwater scenes.
Understanding Masks in Lightroom
A mask allows you to edit specific areas of a photo without affecting other parts. For instance, you can brighten only the subject or change only the color of the water. Lightroom offers several masking tools:
- Brush: Manually paint over the specific area you want to adjust.
- Linear Gradient: Create a gradient effect across the photo.
- Radial Gradient: Apply adjustments in a circular or oval shape.
- AI Selection: Automatically identify and select key subjects or color ranges.
Think of a mask as a transparent layer placed over your photo. You can make changes to that layer without permanently altering the original image. This flexible approach to editing ensures both creative freedom and preservation of the original file.
Five-Step Color Grading Process: A Detailed Guide
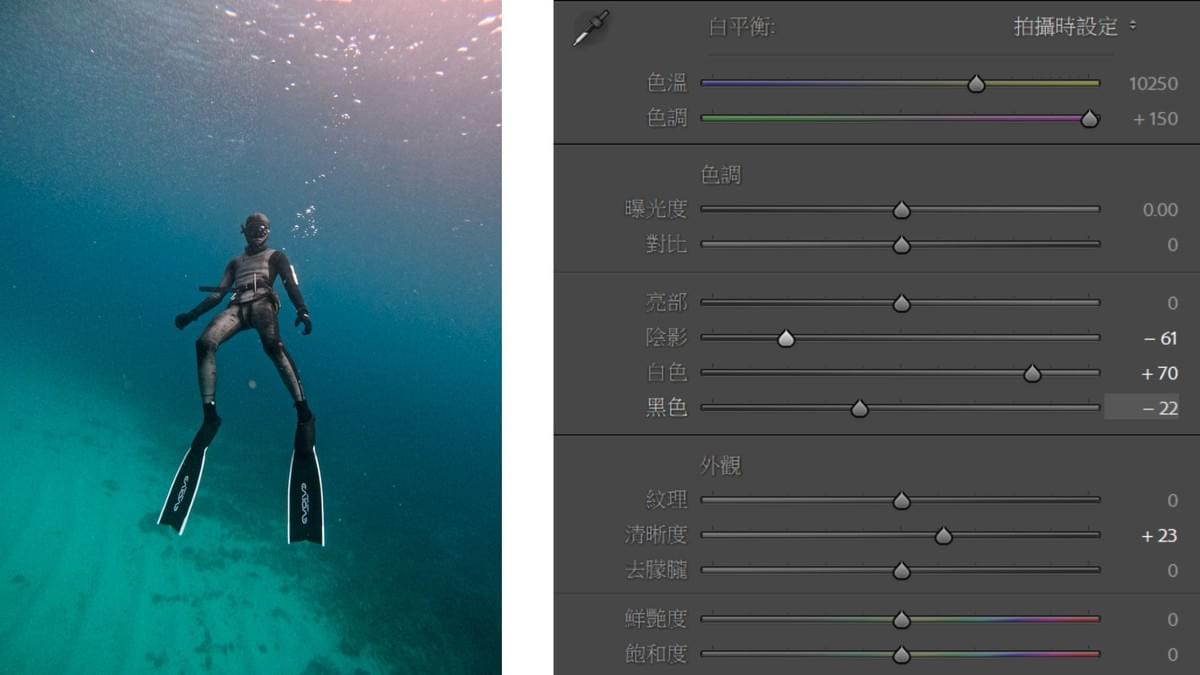
1. Basic Light Adjustments
Objective: Establish the foundational tone of the image.
- Enhance overall image depth.
- Reduce shadows and blacks for better balance.
- Increase whites and highlights, but avoid overexposure.
These adjustments create a solid foundation for the subsequent color grading steps.
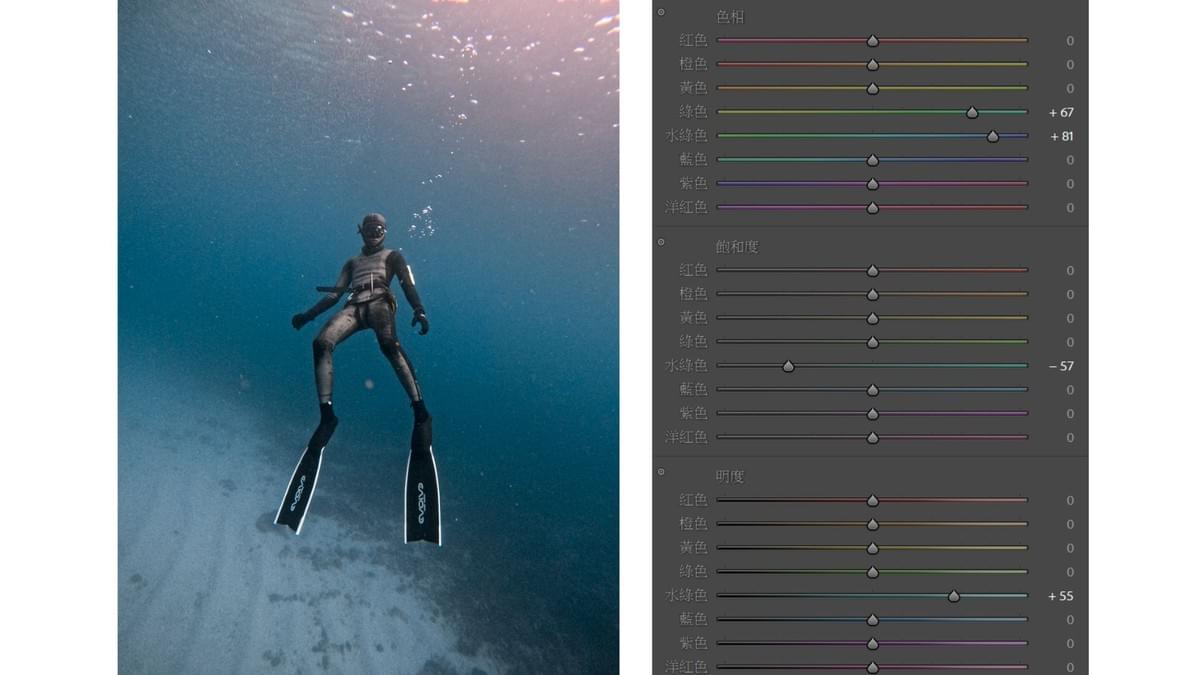
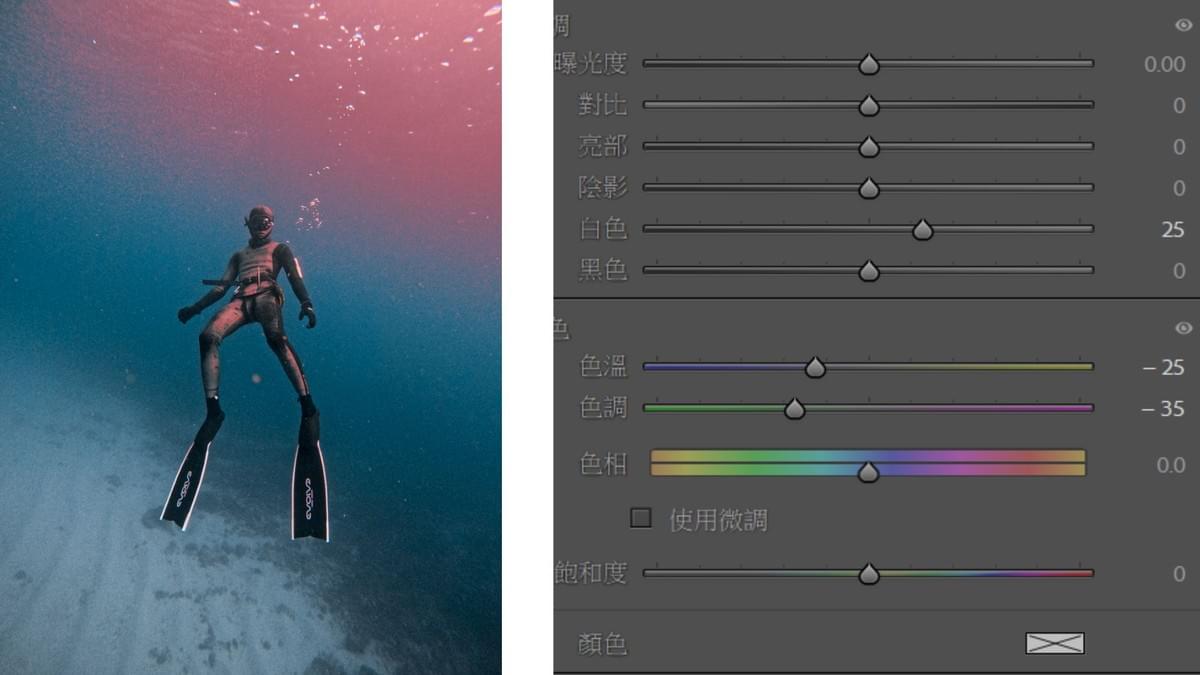
2.Color Mixer
Objective: Optimize specific color regions.
- Adjust the hue of greens and aqua tones to make sandy areas appear more natural.
- Reduce the saturation of water tones to avoid an overly vibrant look.
- Increase brightness to enhance the visibility of sandy areas.
- Fine-tune the blue tones to enhance the depth and richness of the water.
3. Adjusting Local Light Sources
- Use the masking tool to select specific areas.
- Apply the white balance tool to correct color casts.
- Ensure the lighting appears natural and maintains overall image harmony.
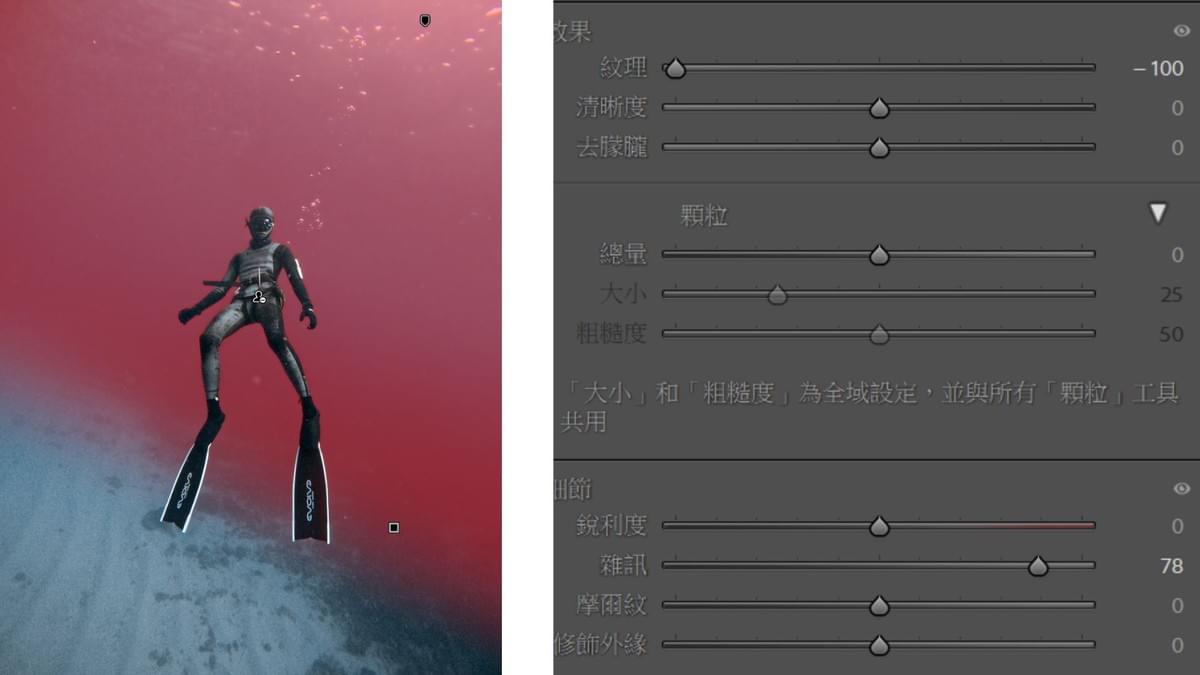
4. Background Optimization
- Select the water area for localized adjustments.
- Reduce noise to enhance image quality.
- Apply background blur to make the subject stand out.
- Maintain a natural look for the water, avoiding excessive blurring.
5. Removing Imperfections
- Use the healing tool to eliminate unwanted floating particles.
- Adjust the brush size appropriately, ensuring a slight feathering effect for a more natural blend with surrounding areas.
- Click or lightly brush over blemishes or spots—Lightroom will automatically sample nearby pixels for seamless correction.
- This technique works best when the surrounding texture is uniform and color variations are minimal

Struggling with Color Grading? Make Your Underwater Photos Stand Out!
You’ve invested a lot in diving and researching various photography gear, but how much time have you spent learning to maximize their potential?
When you see others’ vibrant, detail-rich underwater photos, do you ever wonder—is it the equipment, or is it me?
🔹 Break Through Your Editing Barriers with the wowhigh Underwater Editing Course!
✅ Hands-on Case Analysis – Learn through real examples and understand the logic behind each edit.
✅ Small Group Learning – Develop an eye for visual storytelling and enhance your editing skills.
✅ Customized Curriculum – No restrictions on subject matter, apply editing techniques flexibly.
✅ Create Your Unique Style – More than just color grading, craft your own visual aesthetic.
✅ Lifetime Post-Course Support – Continue receiving guidance even after completing the course.
💡 Now Open for Enrollment! Ready to take your underwater photography to the next level?
👉 DM us to learn more!